SAML SSO - Azure
The ABsmartly Web Console supports SAML SSO with Azure. This guide will walk you through the steps to get it set up!
Configuring Azure
- Go to the Microsoft Entra admin center and sign in with your Azure account.
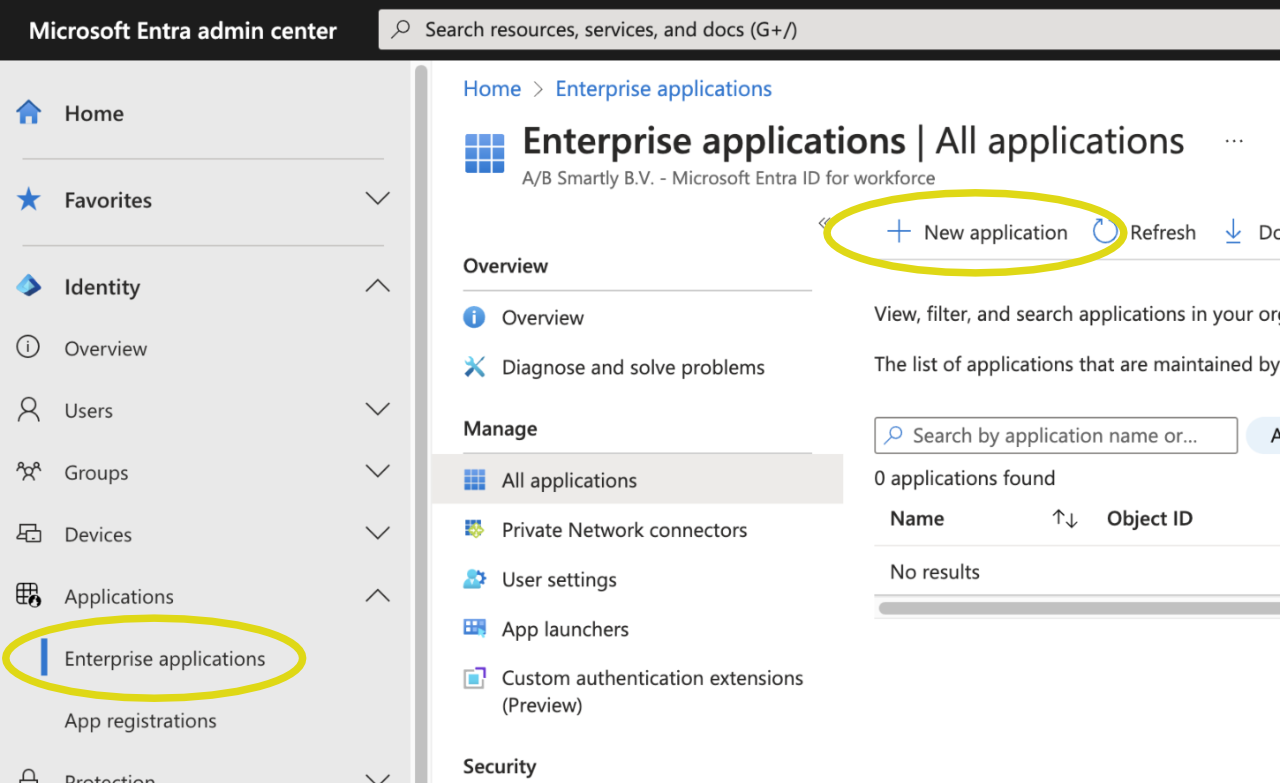
- Click this link or head to Identity > Applications > Enterprise Applications > All applications > New application.
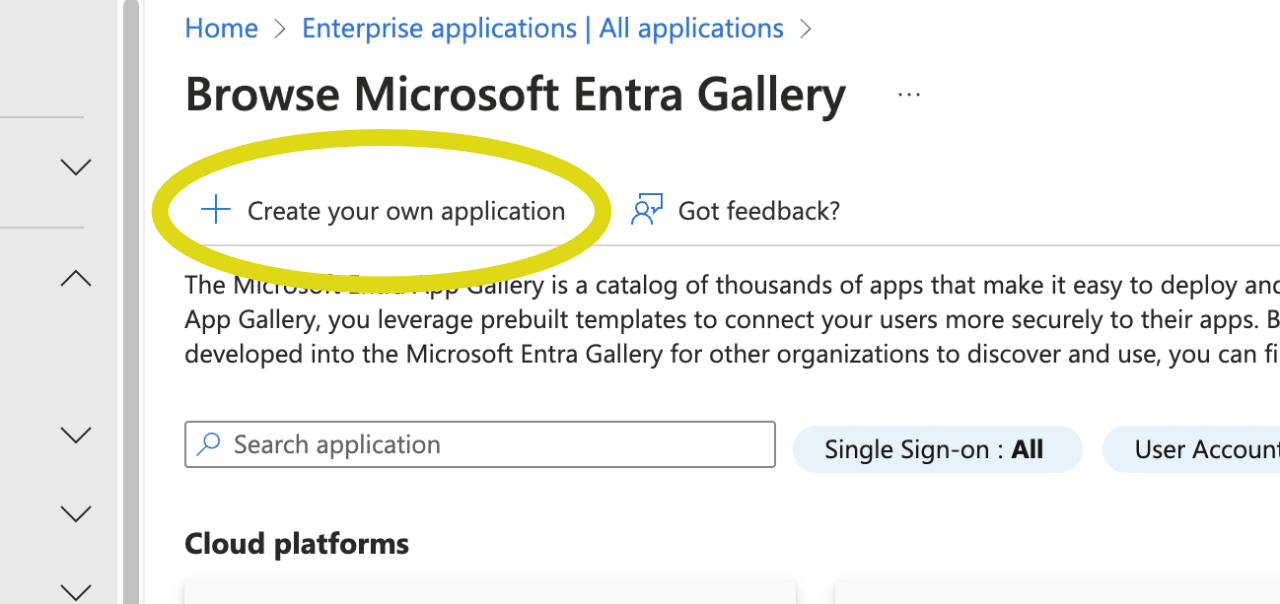
- In the Browse Microsoft Entra Gallery page, click + Create your own application.
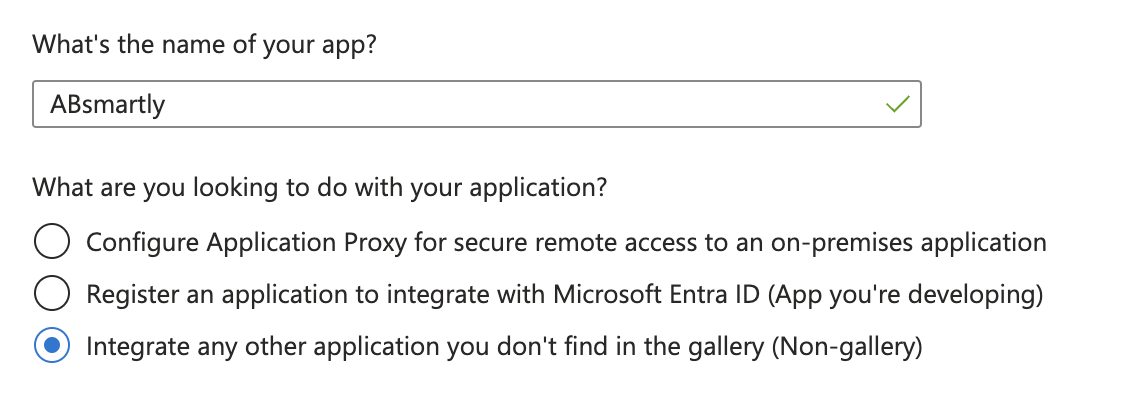
- Name the application ABsmartly and leave the radio button on Integrate any other application you don't find in the gallery (Non-gallery).
- Click Create and you will be redirected to the Overview page of your new application.
info
Feel free to add the ABsmartly logo to the application in Properties > Logo.

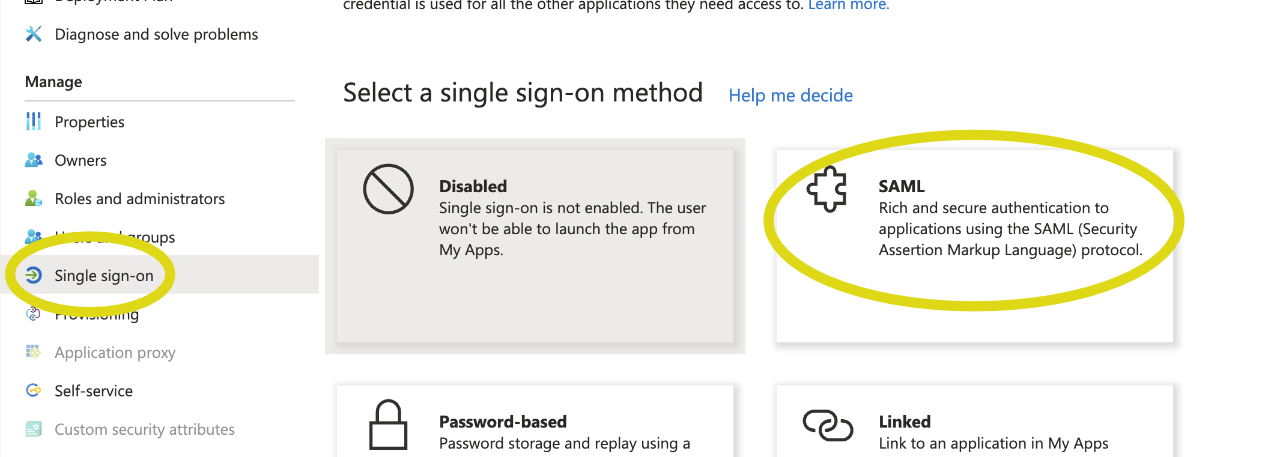
- In the inner left pane, click on Single sign-on and SAML.
-
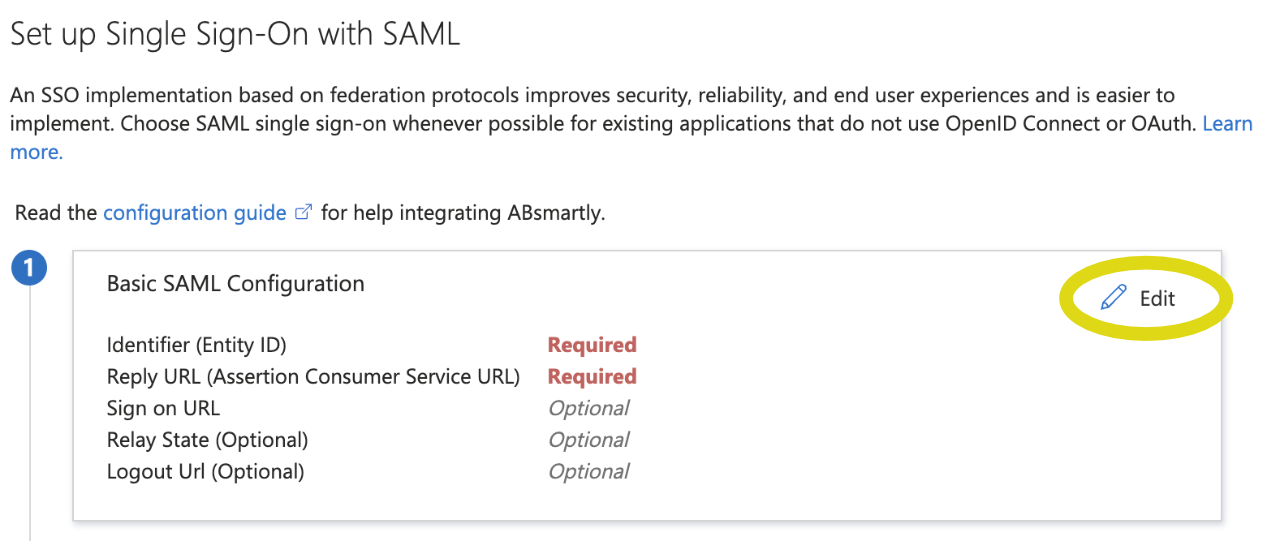
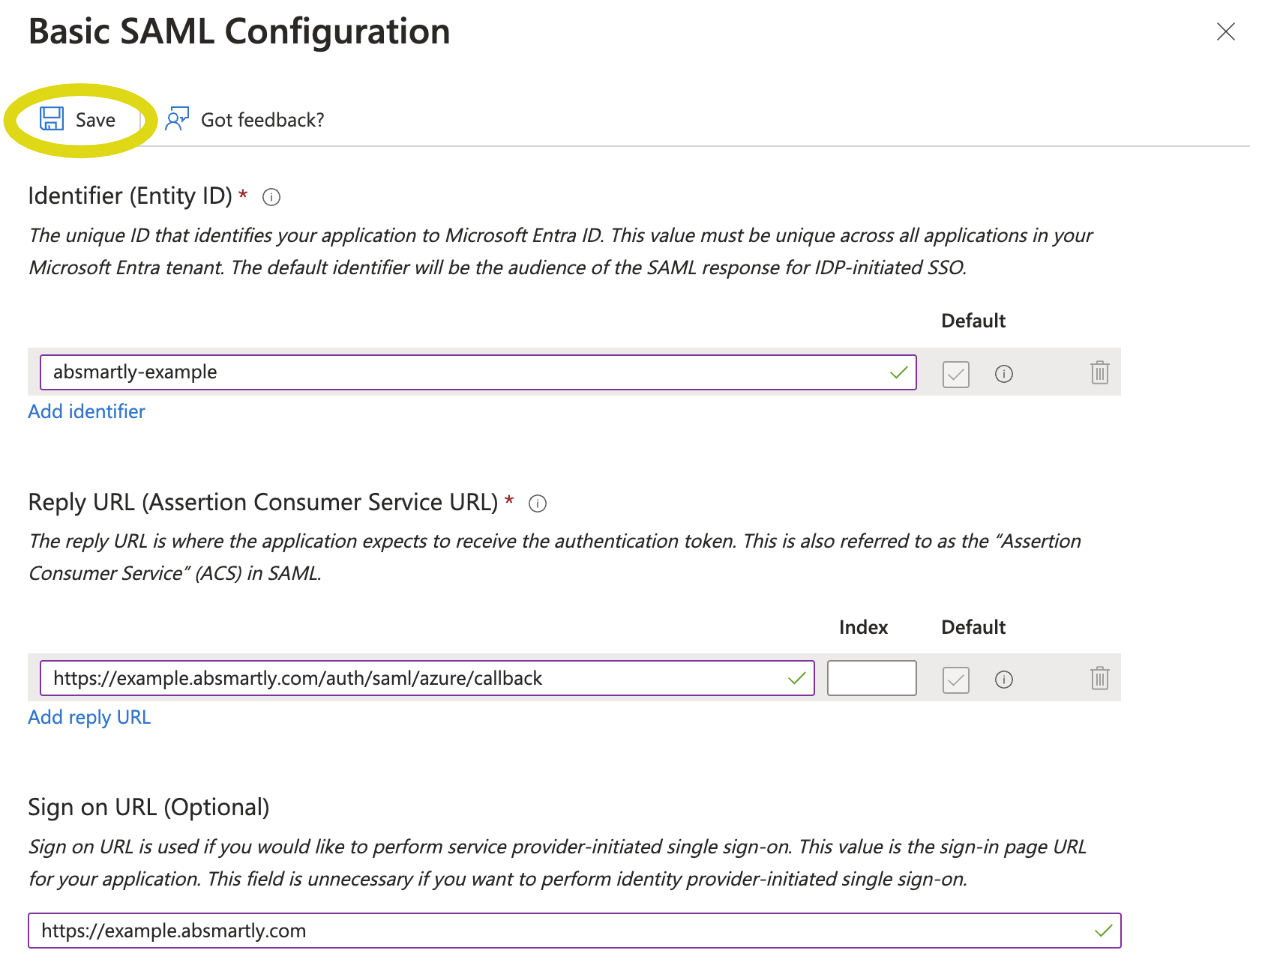
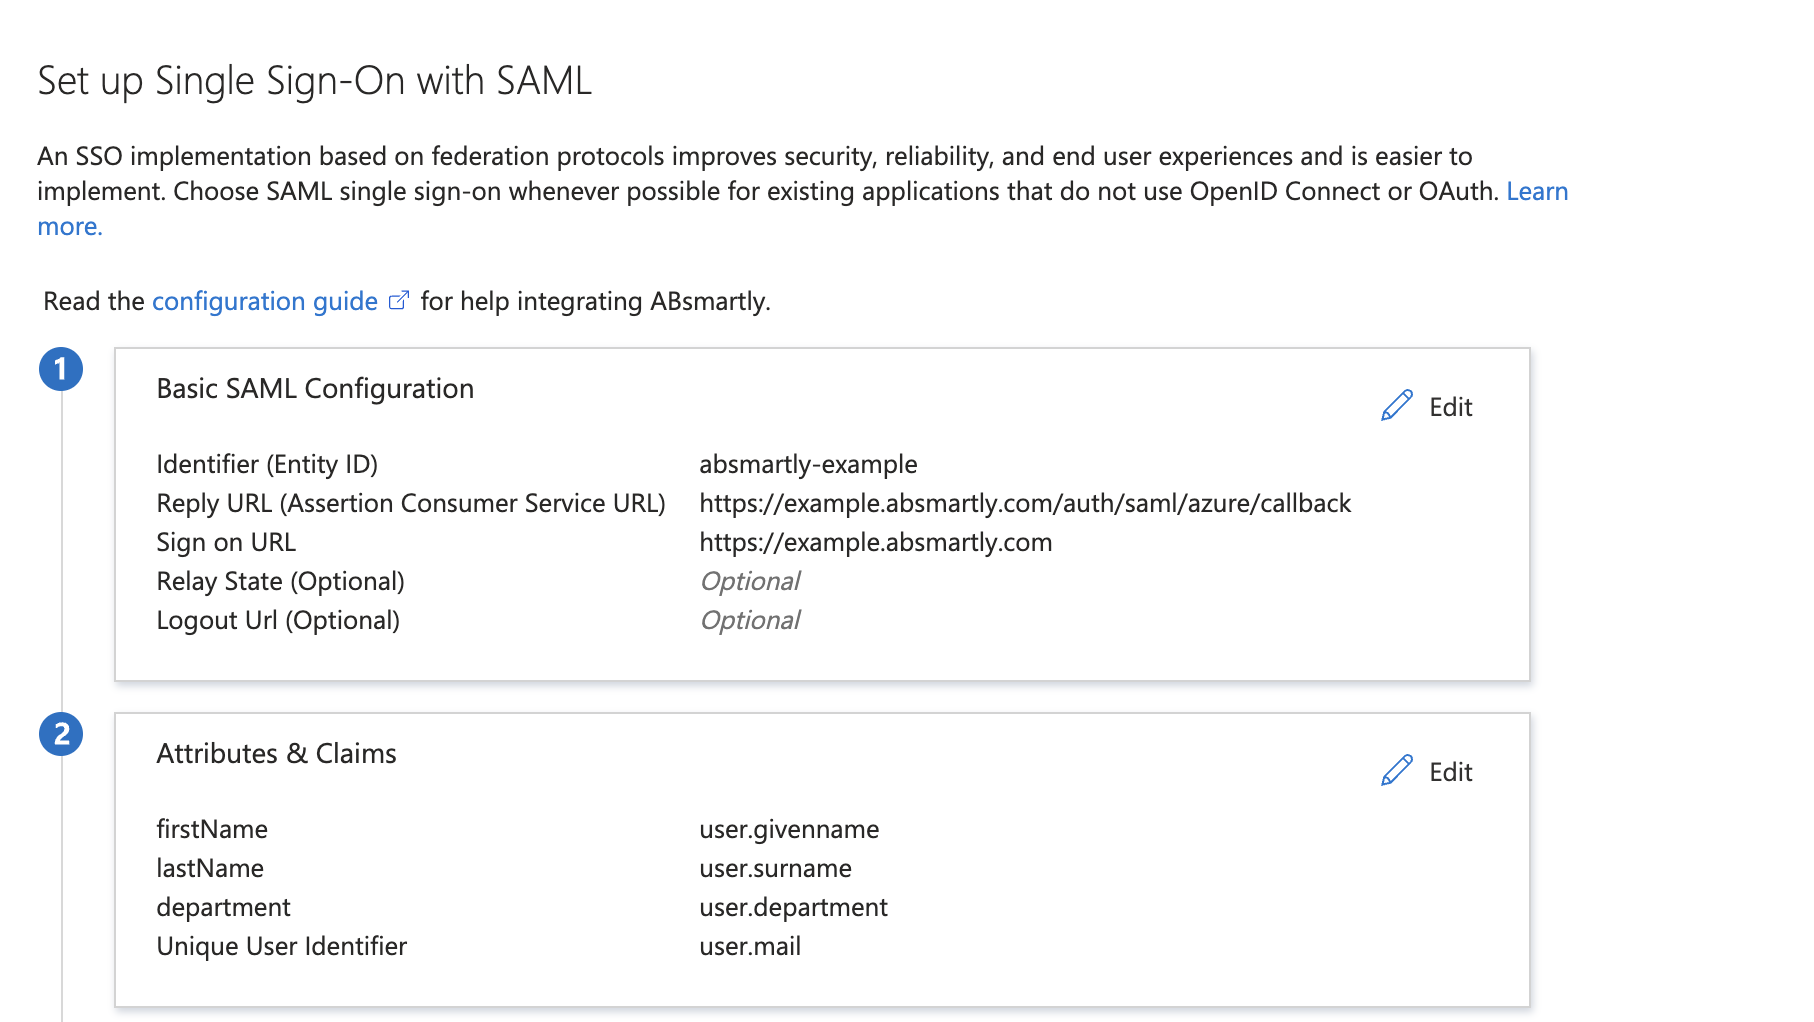
Next to Basic SAML Configuration, click Edit and input the following info:
- Identifier (Entity ID):
absmartly-<your-assigned-subdomain> - Reply URL (Assertion Consumer Service URL):
https://<your-assigned-subdomain>.absmartly.com/auth/saml/azure/callback - Sign on URL:
https://<your-assigned-subdomain>.absmartly.com
- Identifier (Entity ID):
-
Click Save and close the Basic SAML Configuration panel.
-
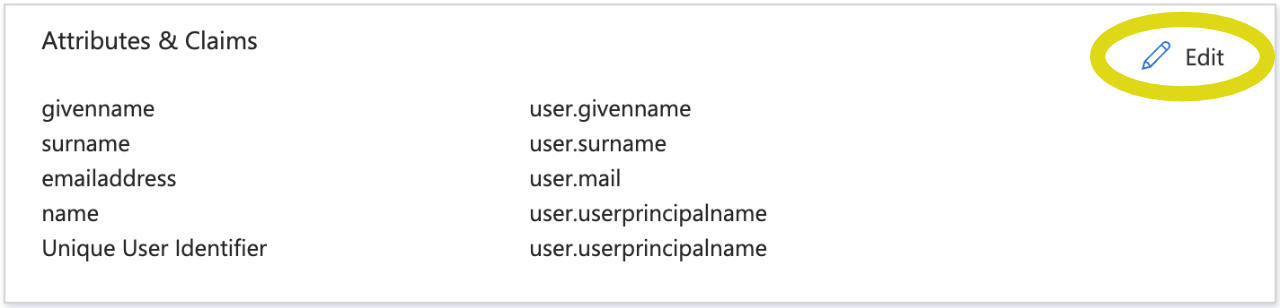
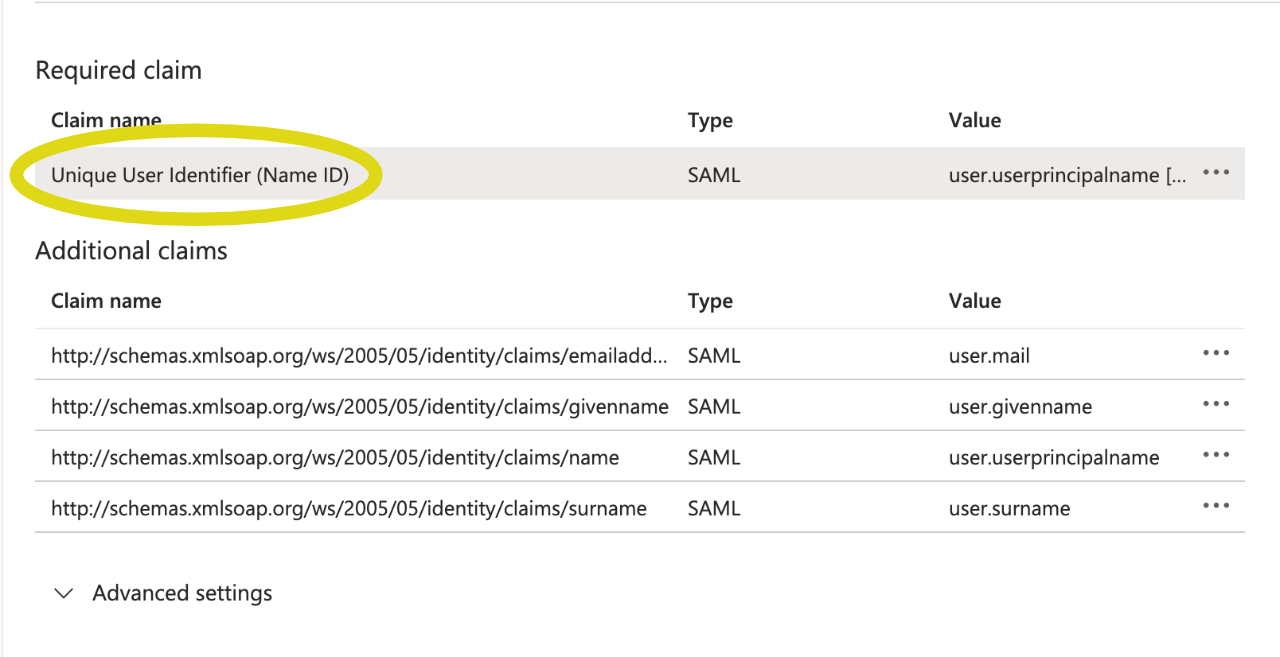
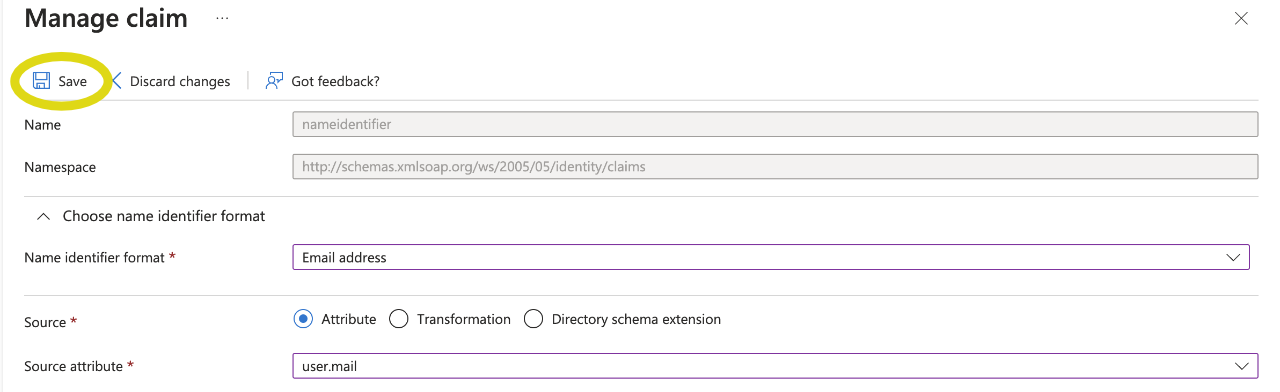
In the User Attributes & Claims section, click Edit and edit the Unique User Identifier (Name ID) (click on its name) with the following:
- Name identifier format:
Email address - Source:
Attribute - Source attribute:
user.mail
- Name identifier format:
-
Click Save and you will be redirected to the Attributes & Claims page.
-
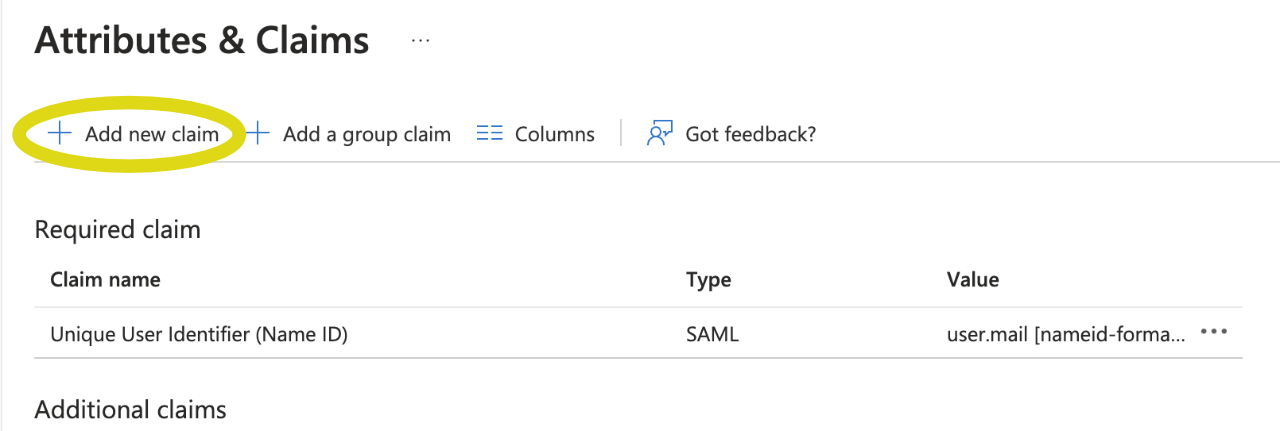
Add the following new claims (Feel free to delete the default ones):
| Name | Source | Source attribute |
|---|---|---|
firstName | Attribute | user.givenname |
lastName | Attribute | user.surname |
department | Attribute | user.department |
- The SAML Based Sign-on page should now look like this:
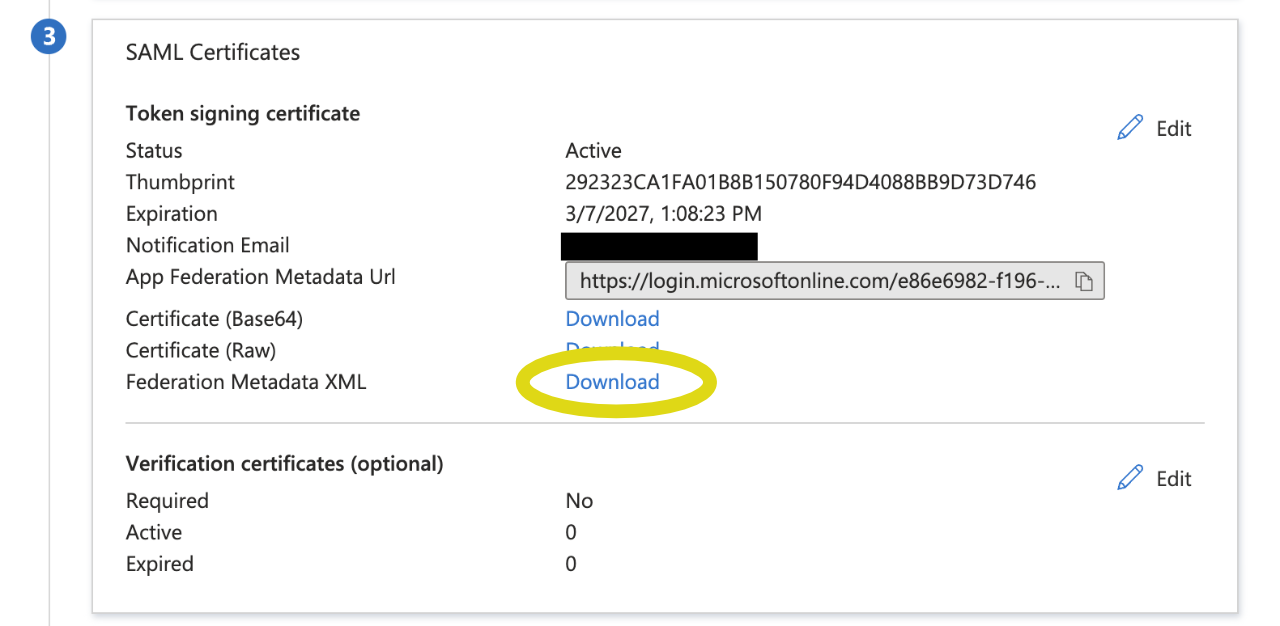
- Lastly, in the SAML Certificates section, click to download your Federtion Metadata XML file, send it to us through email or via Slack and we will have your SSO setup ASAP!
info
Don't forget to assign users to the application in the Users and groups section!